Friday, August 3, 2012

Frugal Friday: Schneider Saddlery's Bonus Bucks Program

Recently, I went down to the mail room and discovered a rather unassuming envelope from Schneider's Saddlery. I was a little perplexed, since the last order I placed with the company had already been filled just as I expected and all of the items arrived in perfect condition. As it turned out, that order was just what I needed to earn a $20 Bonus Bucks voucher! Yay!


Admittedly, it's been a few years since I started making purchases from Schneider's and I forgot all about the Bonus Bucks program until my voucher showed up. Needless to say, I was very pleasantly surprised to find that my customer loyalty was paying off!

Schneider's Bonus Bucks program is really very simple. Schneider's awards one point for every $1 spent through their catalog/website, or at the merchant stalls they set up at major horse shows such as the All American Quarter Horse Congress and Scottsdale Arabian Horse Show. (If you've made a purchase from Schneider's at a show, save your receipts! You'll need to mail them in to collect your points.) For every 500 points, Schneider's mails out a $20 Bonus Bucks voucher. Easy, right?

For someone like me, it can take a little while to reap the benefits of the Bonus Bucks program. I only have two horses -- Sam, the dressage horse you all know about, and Skeeter, a retired Appaloosa foxhunter mare -- and my purchases are generally rather small thanks to that pesky "horse-owner-on-a-student-budget" thing. Not to mention, Schneider's has some of the lowest, most competitive prices in the American horse industry matched with high quality items, so it's not like I'm having to go buy another $350+ turnout blanket every year. (Not that I'm complaining!)

Now, what to buy...

UPDATE!

 This weekend, Schneider's is offering a special deal! Place an order between 10 am and 5 pm EST on August 3-4, 2012 and receive free navy polo wraps. Good timing, huh?


Disclaimer: I am not an affiliate of Schneider's Saddlery and have not been reimbursed in any way for sharing this blog post with you. I just like the company and the products they sell, and I'm pretty sure you will too!

Friday, July 20, 2012

Frugal Friday: Gone to the Dogs!

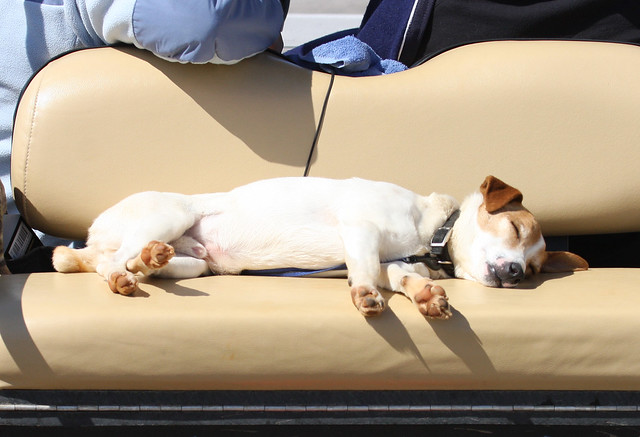
We've all seen it. The Australian cattle dog lying in the grass just outside the arena during a riding lesson. The Jack Russel terriers or Corgis piled up in a golf cart at shows across the country. The loveable mutt that greets every visitor to the barn. There's just something special about a barn dog.


Because riders love to spoil their dogs almost as much as they spoil their horses, I've scoured the 'net for the best doggie deals I could find. The result? DoggyLoot.com


If I had to describe DoggyLoot, I'd call it LivingSocial for dogs. Essentially, the folks at DoggyLoot sell high quality dog toys, treats, and other supplies at deep discounts that are sometimes close to 75% off. As if that wasn't enough to entice the discriminating dog owner to make a purchase, they offer free shipping on all products. Sweet deal!

All you have to do to get in on the deals is sign up with Facebook or your e-mail address, and choose the size of dog you have. (I went for medium, since I have a pair of dachshunds that are extremely aggressive chewers and obliterate small dog chews/toys within a day or two.) The only catch is that, like LivingSocial, DoggyLoot deals are available for a limited time and once they're gone, they're gone.

Today's DoggyLoot deals for medium dogs include:
  • 54% off two moose antler chews (retails for $46, on sale for $21)
  • 58% off 10 6" USDA free range Bully Sticks (retails for $43, on sale for $18)
  • 33% off Ark Naturals Joint Rescue Treats (retails for $21, on sale for $14)
If you want to join DoggyLoot, please click through my special "refer a friend" link: https://doggyloot.com/invite/8645f2c4 You'll get a $5 coupon just for signing up, and I'll get $10 when you make your first purchase. Win-win!

Disclaimer: I am not associated with DoggyLoot in any way and I don't get any kind of reimbursement (beyond the "refer a friend" program) for bringing you this message. I just think they have a really great program and I've been personally satisfied with their offerings and service. Besides, I love having pampered pooches, don't you?

Friday, July 6, 2012

Tutorial: Scalloped Button Braids

Earlier this week, there was some discussion about how to do scallop braids on a dressage group I frequent. I was feeling pretty confident in my braiding abilities, so I volunteered to make a step-by-step tutorial showing the process. I didn't bother braiding the entire mane in this tutorial because I broke both of my hips 5 weeks ago and standing on a mounting block to braid a 17.2hh horse got old very quickly. There should be enough here to give you a good idea of the process, but feel free to ask any questions you might have in the comments below.

Without further ado...

Materials:
  • Stool or mounting block
  • Yarn to match the horse's mane (I used red for visual contrast in this tutorial, but would use black on Sam if braiding for a show.)
  • Water and a sponge/cloth OR braiding product such as QuicBraid
  • Stylist's Clip
  • Scissors
  • Rug hook or Speedy Braid Pull Through
  • Braid Aid comb (optional -- I find them more awkward than necessary, so I didn't use one.)
Preparations:
  • Before braiding, make sure the horse is comfortable in a reasonably quiet area. The fewer distractions, the better. Consider offering a hay net tied at about eye level or, if absolutely necessary, use a twitch to keep the horse from fidgeting around too much.
  • Holding the end of the yarn in one hand, loop the yarn around your elbow approximately 25-30 times, and cut the loops once. The result will be 25-30 pieces of 14-18" yarn with which you'll tie the finished braids.
  • Thread the yarn through the upper ring of the horse's halter on the right side for ease of access while braiding. (Remember, always braid on the horse's right side!)


 Step 1: Wet the mane or apply a braiding product such as QuicBraid to give the hair a better grip. Divide the hair into a section approximately 1" wide. Pin back the rest of the mane with a stylist's clip (included in most braiding kits).

Step 2: Divide the 1" section into three even sections and begin a normal braid. Remember to braid with downward tension on the hair to keep the mane lying flat and close to the neck. Pulling outward toward yourself will only result in loose, bulky braids that want to stick out everywhere and will bounce with the horse's movement.

 Step 3: Halfway down the braid, grab one of those pieces of yarn...

Step 4: ... and introduce the yarn into your braid. I like to bring the yarn underneath the braid, then loop one end of the yarn over the braid before adding the tails into the outermost sections of hair. By doing that, I have created a little "anchor" in the braid that means my yarn won't slip loose. Continue braiding. 

 Step 5: When you reach the end of the braid, separate the ends of the hair from the yarn.

 Step 6: Flip the yarn over the top of the braid to create a loop. Reach through the loop and pull the loose ends of the yarn through to create a knot around the braid. Make sure you pull the yarn snug and leave just a little bit of hair sticking out so that the braid doesn't start to unravel.

 Step 7: Once the entire mane is braided as in steps 1-6, it's time to start tying up the braids. To begin, push your rug hook or pull-through down into the top of the braid, being careful not to poke your horse while staying as close to the crest as possible.

 Step 8: Thread the ends of the yarn into your pull-through. (If you are using a rug hook, make sure you flip the little metal latch down or else you'll end up making a mess of your braid and getting the hook stuck in the mane. Not fun!)
 Step 9: Pull the tail ends of the yarn through to the other side. Make sure that the braid fits snug against the crest of the neck, but be careful not to pull the entire braid through to the other side in the process.

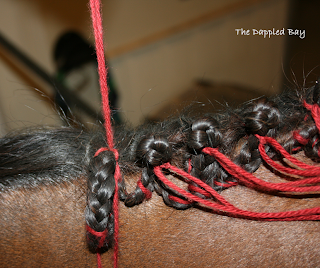
 Step 10A: As you can see, the yarn tail from braid 1 has been pulled through the base of braid 2, and the tail of braid 2 has been pulled through the base of braid 3. This creates the scalloped effect. (I haven't done it yet, but you might be able to thread the tail of braid 1 into the base of braid 3 to create an even tighter scallop. It's worth trying!)

 Step 10B: In this shot, you can see that the tail end of the last braid has not been pulled up yet. I'm leaving it for the very end because it will have to be tied differently than the others, seeing as it can't be threaded through another braid.

 Step 11: To tie up the braid, pull the tail ends of yarn back over from the left side and separate them to either side of the braided loop.

 Step 12: Tuck the left tail of yarn through the braided loop.

 Step 13: Tie a square knot underneath the braid to secure the tail of the adjacent loop to the crest. Pull the yarn tightly to make sure that everything is secure.

 Step 14: Now that the loop is secured, it's time to start adding on the button. Cross the tails of yarn back together in front of the braid in the beginning of a square knot.
 Step 15: As you tighten the yarn, make sure that they catch against the hair approximately in the middle of the scallop to begin forming the button.

 Step 16: Admittedly, the scallops can be kind of a pain in the butt to work with, so it's perfectly acceptable (although kind of awkward) to poke at the loop with one of your fingers to form the button. Whatever works, right?

 Step 17: Tie up the button with a square knot, being sure to pull the yarn tight so that the button will say secure during performance.

 Step 18: Repeat steps  11-17 until you reach the last braid, which was left hanging down earlier.

The last braid is a little tricky because it can't be formed into a scallop and it will already have the tail of the next-to-last braid tied to it. For that reason, the last braid will be tied off as a "knob" style hunter braid.

 Step 19: Push the rug hook or pull-through down through the top of the last braid and pull its yarn tails up toward the crest. Don't be surprised if there's a little resistance; you may have to wiggle the pull-through a little to dodge the knots from the next-to-last braid.

 Step 20: Pull the tails through, folding the end of the braid up neatly beneath the top half. Tie a square knot to keep the braid snug against the crest.

 Step 21: As before, bring the tails of yarn around to the front of the braid and begin tying a square knot about midway along the braid.
 Step 22: If necessary, use a finger to help push the braid up into a button and...

  
Step 23: ... tie securely with a square knot. By now, you should be an old pro at that!

 
 Step 23: Snip all the loose pieces of yarn from the braids with your scissors, but be extra careful that you don't accidentally cut through one of your knots or, even worse, a big chunk of mane.


Step 24: TA-DA! Step back and admire your work!

I hope this tutorial was helpful. Feel free to share this with your friends, but please refrain from reposting my photos or this tutorial to another site without my permission.

Friday, June 22, 2012

Frugal Friday: SmartPak's SmartPerks Program

Earlier this week, the good people at SmartPak e-mailed me to tell me that I can now get 10% off all SmartPak branded tack and apparel through the SmartPerks program just because I have my horse supplements set to auto-ship each month. Really?! A company wants to reward ME for all the time, money, and sanity that they're saving me (and millions of other horse owners) by ordering supplements in pre-dosed SmartPaks every month? SWEET DEAL!

For anyone who has never bought anything for a horse or dog from SmartPak, my enthusiasm might seem just a little overwhelming. That's why I've decided to show you just how freakin' awesome SmartPak products really are! These are definitely top-shelf items at rock-bottom prices. No joke.

Oh, and did I mention that the 10% off applies to ALL SmartPak brand items, even the stuff already on sale? Or, you know, that every purchase of $75 or more (or $40 if combined with a SmartPak) ships free, every day?  Yeah, even the hefty stuff like tack trunks and saddles.  Exciting!

Without further ado, let's just take a look at some of these little gems...


This flash snaffle bridle is very reasonably priced at only $52.95, but don't let that fool you into thinking that SmartPak skimped on quality. 106 reviewers have given this bridle an average of 5 stars, with 98% of those saying that they would recommend this bridle to a friend.

After receiving hers in the mail, one reviewer said:
"This bridle is NICE! Buttery soft out of the box. You do have to put the bridle together yourself though...didn't expect that! But for the quality/price, I don't mind one bit! Padding is NICE and designed with the horse in mind. Even [though] it doesn't have padding on the crown, the leather on the crown is sooo soft, you don't have to worry about it being padded. ... I recently got a Courbette bridle and it is STONE HARD leather. Not near as nice as this Plymouth! HIGHLY RECOMMENDED! Just as nice as HIGH END!"

I've personally considered buying one of these as a schooling bridle, but several reviewers agree that the Plymouth is so well made that it would be equally at home in the show ring. Nice!


Speaking of the show ring, how about this gorgeous fancy stitched hunter bridle? Made from vegetable tanned North American bridle leather, it features padding at the caveson, browband, and a specially padded mono-crown design to alleviate poll pressure. This one is also a 5 star product with a whopping 100% recommendation rate! Priced at $189.96, this bridle is comparable to many name-brand bridles at nearly three or four times the cost.

In the words of a reviewer:
"This is an amazing bridle! I actually won it in a SmartPak drawing at the World Equestrian Games in Lexington, Ky (Sept. 2010). The stitching is tight and well made, and the leather very rich and supple. After just one oiling it became soft and flexible. Did I mention it is BEAUTIFUL?!!!
I own an ex-running Quarter Horse (she has a slimmer build) and the fit is beautiful. I also love how the crown is built. The special design alleviates any poll pressure on my horse's sensitive poll. I would definitely recommend this bridle to anyone looking for a quality bridle that is going to last a lifetime and stand out in the show ring. My horse loves it and I love it. I would definitely have bought this bridle for myself, I was just lucky enough to have won it! Thank you SmartPak for a wonderful product!"
This awesome set features a fleece dress sheet/cooler, a 1200 denier ripstop deluxe medium-weight turnout blanket, cotton stable sheet, and a quilted stable blanket for just $327.95 Individually, each of those products have excellent reviews from SmartPak customers, but combined? Talk about savings and layering options! (Just in case you haven't checked lately, the price of these 4 blankets is LESS than one midweight turnout from some brands.)

There aren't many reviews on the collection yet (it was just recently introduced), but there are plenty on the individual items. Just go see for yourself!

Honestly, I could go on all day because I absolutely LOVE SmartPak's products, but I'll let you decide just how awesome they are for yourselves. Click Here to Browse!

Thursday, March 8, 2012

Back To Basics III: The "Head Down" Cue

When I first got Sam, he was essentially a fire-breathing dragon in a horse's body. Somewhere down the line, my 17hh giant learned to lift his head to avoid being handled when he'd really rather be left alone. Haltering him was tricky, bridling more-than-troublesome, and deworming? Damn near impossible. He had a penchant for flinging his head up and flying backwards as quickly as his long legs would carry him without regard for the helpless human dangling from his face. Yikes!

Needless to say, that sort of behavior just doesn't fly. Seeing as I'm barely 5'4" on a good day, I knew that the key to a good working relationship with Sam was going to begin with teaching him the "head down" cue.

The "head down" cue isn't just useful for for shorties like me who work with gigantic horses. In fact, I teach the cue to every horse I work with, even ponies. The "head down" cue has several uses, from bridling to clipping bridle paths and cleaning ears, but is especially effective for teaching the horse to give to pressure, relax his neck muscles, and calm down when his instincts dictate otherwise. A horse that knows the "head down" cue is more likely to remain calm if he steps on his lead rope or reins, or to avoid the negative pressure that comes with pulling back against the lead rope when he's standing tied.

There are a number of methods for teaching the "head down" cue, and each of them can be used to encourage the horse to give to pressure at his poll in a variety of situations. When I describe these methods, I am operating under the assumption that you've got a reasonably friendly horse that will at least allow you to approach and handle him to some degree. If you're not currently able to come into contact with your horse, please consult an professional with experience in gentling and handling untouched, skittish, or spoiled horses for assistance.

Teaching the "Head Down" Cue in the Field or Stall (No Headgear)
  •  Standing at your horse's side, place your fingertips over his poll and exert a steady, gentle pressure there. You are not trying to shove the horse's head down, just applying pressure. (Some people like to give the verbal cue, "head down," when they apply the pressure. I don't, but you should do whatever feels comfortable and natural to you.)

  • If your horse resists the pressure by lifting his head or ducking off to the side, remain calm and don't be tempted to increase the amount of pressure you're placing on his poll. Be patient and stick with him, no matter how wiggly he tries to be. (If your horse is very wiggly, you may want to move into a smaller enclosure or try one of the other methods to teach this cue first.)

  • When your horse shows the slightest inclination to drop his head, release the pressure from your fingertips and reward him by stroking his neck or face. Moving your hand to these other areas ensures that you have completely removed the pressure from the poll and is a reward in itself.

  • Wait a few seconds, then repeat.

  • Once your horse seems to be catching on, you can begin to ask him to leave his head low for an extended period of time. To do this, simply time it so that your hand is exerting pressure on your horse's poll when he begins to lift his head. When he drops his head again, release the pressure and praise him. Soon, he'll begin to understand that leaving his head in a lower position means that he won't encounter pressure.

Teaching the "Head Down" Cue with a Halter
  •  Teaching a horse to lower his head while wearing a halter is very similar to teaching him to lower his head without any headgear, except that the pressure on his poll will be applied using the crown piece of his halter through a downward pull on the lead. 

  • Holding the lead near the snap, exert a one or two pounds of pressure on your horse's head by using a steady downward pull on the rope. Resist the temptation to yank on the lead or release pressure if your horse lifts his head at first; you don't want to start a fight you can't win, nor do you want to reward him for displaying the wrong behavior.

  • Release the pressure when your horse makes any effort to drop his head into a lower position and praise him for trying. Keep at it until you can move your horse's head to the desired height and get him to leave it there, as described above.

Teaching the "Head Down" Cue with a Bridle 
  • Teaching the "head down" cue to a horse wearing a bridle is very similar to the above methods, but you must be extremely careful about applying pressure to the mouth in this lesson. This is especially true if your horse is wearing a harsh bit or one with a great deal of leverage. Ideally, your horse would be outfitted in a plain snaffle for this lesson, but I realize that isn't always feasible for everyone.  
 
  • Practice applying pressure on the poll by pulling downward on the left rein, then repeat with the right. Once your horse responds to the cue correctly from the individual reins, you can gradually transition to exerting pressure on both reins at the same time to ask him to lower his head.
Expanding on the "Head Down" Cue

 If you have taught the "head down" cue correctly and your horse is responding consistently by dropping his head when pressure is applied to his poll, you can begin expanding upon that lesson by teaching your horse to remain calm when he steps on his lead rope.

I actually allowed Sam to teach himself how to respond to stepping on his lead rope, using the "head down" cue that I had already installed to help him figure out what to do. Early on in our "relationship," Sam suffered a deep laceration to his left front pastern and required stall rest and hand walking daily. One day, while I was allowing him to graze in the barn yard, I decided to drop the lead rope. I knew that Sam would eventually move on to another patch of clover and it was just a matter of time before he stepped on his lead rope, just as I had planned.

At first, Sam reacted with great surprise at the sudden pressure on his poll and yanked his head straight up in alarm, looked around, and went back to grazing. Eventually, after stepping on his lead rope several more times in the course of his grazing session, Sam's response to the pressure on his head lessened in intensity. He had figured out on his own that he could avoid the pressure all together if he remained calm, lowered his head, and moved a little. I could almost see the wheels turning in his head as he figured out that the pressure would stop all together if he'd just back up or step to the side a little, and then he could free himself and go on about his business.

Remember to practice this exercise (preferably, all three methods) in a variety of situations until your horse can respond consistently, even with distractions around. A horse that responds to pressure without panicking is one that is much safer to handle and more pleasurable to ride.


Friday, March 2, 2012

Back to Basics II: Stall Manners

I have been fortunate enough to have horses with good stall manners, but I've met my fair share of those who are less than friendly in the stall. I'm not talking about common stall vices such as cribbing, wood chewing, or weaving, but more dangerous antics like lunging toward anyone who opens the stall door or turning around as if to kick. Maybe it's just me, but I find that sort of behavior to be completely unacceptable.

When I open a stall door, I expect the horse inside to turn and greet me in a calm, friendly manner. Unfortunately, there are plenty of horses who don't react that way. The good news is that stall manners are largely learned behaviors and can be modified with a little work.

There are a couple of methods that can be used to reform the horse that habitually turns his rump to you when you open the stall door.

  1. If your horse is food-oriented: 
  • Call your horse's name to get his attention. 
  • When he turns to look at you, call his name and give the cue "Come!" or "Come on!" to invite him over toward you.
  • After your horse stakes a few steps in your direction, praise him for the effort by meeting him part way, giving him a pet, and offering a treat.
  • Repeat the process several times, gradually increasing the distance your horse has to travel before he his given a verbal or edible reward.
  • When your horse is reliably coming to you when you open the stall door and call him, you can begin weaning him off of the food rewards so that he doesn't expect a treat every time you come to get him out of the stall. (This will also help prevent your horse from learning the horrible habit of "frisking" you every time he sees you in search of treats. Not only is his invasion of your space rude, you are also at a greater risk of being nipped if your horse becomes overzealous in his search for goodies.)
  • NOTE: Do NOT show your horse the treat before he has made the effort to come to you. Showing the treat before your horse has done anything means that you are merely bribing him, not conditioning him to accept and respond to a specific verbal cue cue.
  • BONUS TIP! Once you have taught the "Come!" cue, you can begin using it at far greater distances, such as calling your horse over to you in his paddock or pasture. You can use a round pen or longe line to begin practicing the cue at a distance of your choosing, graduating to greater distances after your horse is coming to you consistently. Trust me when I say this is a great cue to have in your "toolbox" when it's pouring down rain and you've got to feed a pasture-full of horses before dark!
  1. If you prefer not to use treats:
  • Call your horse's name to get his attention and give him the opportunity to turn toward you.
  • If he does not turn toward you, flick the tail end of a lead rope toward his hindquarters. This taps into the horse's natural inclination to move away from pressure, encouraging him to move his feet and swing his body away from the pressure.
  • When your horse turns to face you with both eyes, stop swinging your lead rope at him and take a few steps back. In so doing, you are removing the source of the pressure and rewarding your horse for his efforts.
  • With practice, the horse will learn that he can avoid the pressure all together by turning to face you when you open the stall door.
  • NOTE: This method can be tricky if your horse is aggressive in his stall or is a known kicker. PLEASE be careful! Knowing your horse's personality can help you decide when you should keep going and when you should take a step back and consider another approach.
Regardless of which method you choose, BE CONSISTENT! Horses, like most creatures, learn through repetition and consistency. If you create an environment where your horse can predict your behavior in a certain situation, he will learn to modify his own reactions accordingly.

Saturday, February 18, 2012

Frugal Friday: Tack of the Day

If you haven't heard of Tack of the Day yet, you're missing out!

Tack of the Day, better known to most tack addicts as "TOTD," is a flash sale website that offers tack and other horse-related items at scandalously low prices. TOTD announces two new products for sale Monday through Friday at 12 noon EST. The quantities are limited, so checking in on the daily offerings before they're all gone is imperative if you want the best chances of finding something in your size, color, etc.

Sometimes, you can find unbelievable deals through the TOTD website. A couple of years ago, I managed to find a fitted Mattes sheepskin show pad for my close contact saddle for 69% off of the manufacturer's retail price. It fit Sam perfectly and arrived just in time for our A-circuit show debut. The quilted top was baby pink, but at that price who cares? It's not like you could see it under the saddle anyway.

Sam and I schooling on a brisk morning at Penrose Farm in our fancy Mattes pad from TOTD!

Be sure to sign up for the daily notifications from TOTD so you never miss a chance to snag great horse stuff at unbelievable prices!

Thursday, February 16, 2012

Back To Basics I: Why Does My Horse Need a Refresher Course?

If winter weather is making riding impractical, you can still use your barn time to give your horse a refresher course in ground manners. Many people don't realize that every interaction with a horse is a training opportunity, for better or worse. It's tempting to let a little quirk or misbehavior slide until it snowball into a full-blown problem, but you can avoid most groundwork issues all together with just a few simple exercises.

 You've owned your horse for years. You know all of his little quirks like the back of your hand. He does a few things that might annoy other people, but you've learned to deal with his antics and adapted your routine accordingly. Why should you worry about going through a refresher course for ground manners?

Odds are, you are not the only person that handles your horse. Since most horses in the United States are boarded, your horse likely comes into contact with the barn manager and/or stable hands on a daily basis. Every 6-8 weeks, he'll need to be seen by the farrier, and he'll probably need to see the vet a few times each year for a variety of routine procedures. Everyone who comes into contact with your horse will be very grateful to you if he is well-mannered and respectful, particularly because a mannerly horse is also one that is safer to handle.

World renowned trainer and horseman Clinton Anderson says"Whatever a horse practices, he gets good at." If your horse practices crowding or pushing you around as you're leading him in from the pasture, he'll eventually turn that bad behavior into a bad habit. Likewise, the horse that is asked to turn and face you in the stall will eventually turn that good behavior into a good habit (not to mention that the likelihood that you'll be kicked when you come into your horse's space will be greatly reduced).

How do you teach your horse the difference between good and bad behavior? "Make the wrong thing difficult and the right thing easy," says Anderson. "Correct him the first time [he shows bad behavior], and every time he does it, until he forms the right habit."

Over the next several days, I'll be bringing you a series of articles designed to help you regain your horse's respectfulness or, in the case of young horses, teach him the good manners he should know for the rest of his life. The result will be a horse that is safer, more fun to be around, and more marketable should you ever decide to sell or lease him.


Monday, February 6, 2012

JudgeMyRide.net!


Last week, the editors of Judge My Ride (JMR) put out a call for an intern that could help promote the site via Facebook. I put in my application and, within a few hours, I got the job!

If you've never heard of Judge My Ride, you've been missing out! JMR was designed to provide riders with a unique opportunity to receive feedback from a number of highly qualified judges, riders, and trainers. All you have to do is sign up for an account on the JMR website (don't worry -- it's free and only takes a few minutes!), post photos or videos of your riding, and wait for your critique.

I have personally used JMR to gain a different perspective on my dressage work with Sam. I've found that having a fresh pair of eyes can sometimes cultivate a different way of thinking, especially if I've been grappling with an issue for a while. Most recently, JMR's dressage judge, Jennifer Barrows, gave me a few tips to transition my leg from a very huntseat pose to a more elongated dressage silhouette. Instead of thinking about twisting my toes into a more forward-pointing position, she suggested that I take a few minutes to think about rolling my thighs more inward, without stirrups, at the beginning of my ride to let my legs loosen up, stretch downward, and wrap around Sam's ribs with better contact. Within a few rides, I could already feel improvement!

Even if you already have a relationship with a trainer, I strongly encourage you to join the discussions on JMR. It's an excellent way to promote your sales horses, discover what the judges are looking for in the ring, and meet up with like-minded riders the world over. You may even be featured on the website or Facebook pages!

Judge My Ride on Facebook

Equitation, by Judge My Ride on Facebook


Style My Ride on Facebook

Friday, February 3, 2012

Frugal Friday: Save on Suds!

Now that the weather in our area has been unseasonably warm for a few weeks, I'm starting to feel the need for a little spring cleaning around the barn. After Sam decided to turn himself into a muddy monster last night, a bath is certainly at the top of my list!

The sheer number of horse shampoos available on the market can be mind-boggling, not to mention pricey. I recently saw a 500ml (16.9 oz.) bottle of plain-Jane, no-frills shampoo for sale in my local tack shop for $19.00. Yikes!

What's a girl to do when she wants a clean horse, but doesn't want to pay a small fortune on shampoos and conditioners at the tack shop? Hit the local grocery stores and supermarkets! Although the products may not be "specially formulated" for your horse, many human products contain the same (or better) cleaning ingredients than their specialized counterparts for a fraction of the price. What's not to love?

One of my favorite grocery-aisle grooming products is Ultra Ivory Concentrated Dishwashing Liquid soap. As with all Ivory products, the dish soap is made of only natural, organic ingredients that are biodegradable and will not remove the natural oils from skin. In addition to its common-sense use as a soap for scrubbing feed bins and buckets, I swear by Ivory Dishwashing Liquid as a mild shampoo and bit cleaner.


Product Image Courtesy Walmart.com

When I bathe a horse, I typically dilute 2-3 oz. of Ivory soap in approximately 4 gallons of lukewarm water and use a sponge or wash cloth to work the soap into the coat, mane, and tail. I've found that Ivory works into a nice lather that gets up all of the dirt and dandruff without requiring an epic scrubbing battle. Even better? The diluted soap rinses out easily without leaving an icky, skin-drying film behind.

A 24 oz. bottle of Ivory Dishwashing Liquid usually sells for approximately $3.00 in grocery stores and supermarkets, but larger quantities are available. If you have a big barn with lots of horses, buckets, and other "stuff" to clean, Amazon.com and other online retailers offer bulk-buy packages of two to six 90 oz. bottles for as little as 10 cents an ounce.

The Breakdown:
24 oz. Ivory Soap: $3.00 / 24 oz. = approximately 12 cents per ounce.
16.9 oz. basic horse shampoo: $18.95 / 16.9 oz. = approximately $1.12 per ounce.


Friday, January 27, 2012

Frugal Friday: Farnam Equine Coupons!

At the beginning of each new year, I like to go through my tack box and take an inventory of all the many, sundry things that have collected there from the year before. I like to keep a well-stocked tack box in case of emergencies - I can't tell you how many times I've been able to produce a much-needed item for a friend in a pinch! - so I make note of any items that need to be replaced or repaired.

As almost any horseman can tell you, keeping a variety of grooming and health care products on hand isn't a cheap endeavor at the outset. I promise that it gets easier as time goes by, especially if you're a smart shopper and use coupons for those much-needed products in conjunction with the on-going sales in many tack shops and catalogs.

Today's Frugal Friday post brings you a number of coupons from Farnam, a trusted name in horse care since 1946. Like last week's Absorbine coupon, these are available as PDF files and can be printed and used as often as you like, so long as you follow the guidelines listed on the coupons themselves.


$1.00 of any one Farnam or Horse Health Wound Care Product
Includes any Aloedine, Aloe Heal, Blue Lotion, Clear Eyes drops, Excalibur sheath cleaner, Povidone-Iodine (generic Betadine), Scarlex, TRI-Care, Viodine, Wonder Dust, or Wound Coat product.

$1.00 off any one Farnam Brand Fly Spray, Fly Mask, or Spot-On Fly Control
Excludes ointments, roll-on fly repellent, lotions, and Bronco products.

$1.00 off one Cool Pack Green Jelly Liniment

$3.00 off one 4 lb. tub of Forshner's Hoof Packing

$8.00 off one 14 lb. tub of Forshner's Hoof Packing

$1.25 off one Horse Health 2-in-1 Shampoo & Conditioner

$1.00 off 4 Doses of Horse Health 1.87% Ivermectin Dewormer

$3.00 off one Horseshoer's Secret Deep-Penetrating Hoof Conditioner

$1.25 off one Horseshoer's Secret Hoof Sealant or Trush Treatment

$1.25 off one 7.5 lb. Icetight 24 Hour Poultice

$3.00 off 25 lb. Icetight 24 Hour Poultice

$5.00 off 46 lb. Icetight 24 Hour Poultice

$1.00 off 1 Dose of IverCare 1.87% Ivermectin Dewormer

$1.50 off any one Laser Sheen Product

$1.25 off any one Leather New Product

$1.25 off any one Vetrolin Product

Happy Shopping!

Sunday, January 22, 2012

Whoops! Here, have a coupon!

First off, I apologize for missing this week's installment of Frugal Friday. Please accept this coupon for $2.00 off any Absorbine product while I try to get things settled down a little over here. It's good until 12/31/2012 and can be printed as many times as you need, so feel free to stock up on all your favorite Absorbine grooming products!

Lots of things are happening for me on the horsey scene here in the Alpharetta area, partially driven by financial necessity and partially guided by the fact that I have a very certain perspective on the way a horse should be cared for. More on that when I actually reveal what's going on behind the scenes in February. Stay tuned!

Friday, January 13, 2012

Frugal Friday: Save The Velcro!

When I started this blog a few weeks ago, I had a clear mission in mind: to help my fellow rider on a "shoestring" budget enjoy horses to the fullest. Now that all of the holiday hustle and bustle is done, I'm pleased to announce my weekly mini-series, "Frugal Friday." Each Friday, I'll bring you a money-saving tip to help you stretch your dollar a little further when it comes to buying feed, tack, and other equestrian supplies. Enjoy!

Maybe it's just me, but I'm driven completely bonkers by the grass, horse hair, and other random junk that gets stuck in the Velcro on my polo wraps, schooling boots, horse blankets, saddle pads... you get the point. What good is a hook and loop closure if it just won't stay closed?

I was doing a little internet window-shopping for tack I really don't need when I found the VelCleaner by N.E.W. I was really excited to see that someone had finally come up with a way to get all the debris out of my Velcro, until I saw the price. $19.95? Are you kidding me? Clean Velcro is great, but not at that price!


Needless to say, I had to find a cheaper alternative. The VelCleaner reminded me of a slicker brush used for dog grooming, right down to the angled metal teeth. I just so happened to have a slicker brush in my doggie care kit at home, so I decided to give it a go.


 After a few minutes of brushing, my fleece-lined dressage boots were finally free of the fleece that inevitably gets stuck on every time I throw them into the washing machine. Yay! Just like new!

The Grreat Choice Soft Slicker Brush for Cats is on sale at PetSmart right now for just $1.99, but I'm sure you can find a similarly priced slicker brush just about anywhere that carries pet supplies. Just remember to look for a brush with plain metal teeth, not the rubber tipped ones, and you're all set!


Wednesday, January 4, 2012

"Baby, it's COLD outside!" Part II: Warm-Up Techniques for the Horse

After riding in last night's windy, 28F weather and carefully dodging frozen areas in the arena, I can't help but laugh at the timeliness of my two-part series on winter warm-up techniques! (And to think, it was unseasonably warm here in the Southeast just last week.) Today, part two addresses warm-up strategies for the horse.


I believe that every ride should begin with a good warm-up, regardless of the weather. A warm-up, as the name suggests, is intended to give the horse an opportunity to warm and loosen his muscles before being asked to do more intense work later on in the ride. Like the warmed-up rider, a horse that has been properly warmed up is at a reduced risk of injury due to strain on his muscles, tendons, and ligaments. As an added bonus, the warm-up process gives the rider an opportunity to judge "where the horse's mind is" and determine whether today is the day to learn something new, or just to practice something the horse has already learned.

The length of your warm-up depends on several factors including, but not limited to, the age and breed of your horse, your riding discipline, and the temperature. As a general rule of thumb, the younger or hotter horse will usually warm up more quickly than his older or lazier counterpart, and all horses will warm up more quickly in warmer weather than in the winter cold. Keep in mind that every horse is different, so listening to your horse is essential in determining which techniques work for you as a pair.

Warming Up with Longe Work

Generally speaking, longe work isn't something that most riders do on a daily basis. However, it certainly has its benefits and shouldn't be dismissed as a good warm-up technique. On the longe, a horse can move out more freely and loosen up his back without interference from the rider's weight or aids. This is an especially useful technique for warming up the young or "cold-backed" horse that might be inclined to buck or rear after being saddled.


Mysti, my Polish Arabian mare, spent a lot of time on the longe line in the early stages of her training. I always liked to make sure that her brain was "installed" before I got on so that we could make each ride a pleasant experience.

If I choose to warm up Sam on the longe line before a ride, I typically begin with 3-4 laps of walk in both directions before asking him to pick up the trot. Once he settles into a nice rhythm in the first direction, I ask him to shorten and extend his stride, then transition from walk to trot several times. After 3-5 minutes, I bring Sam back down to a walk, switch sides, and repeat the trot work going in the opposite direction.

Whether I ask Sam to canter on the longe depends on his willingness in the trot work. If he seems unimpressed with his trot work and is hesitant to move out, I'll ask him to canter quietly both directions, then bring him back to a trot and try again. I never ask Sam to canter on the longe if he is rushing through his trot work or feeling more "up" than usual. I don't want him to associate the cue for canter with an excuse to tear around like a mad-man.

When I'm satisfied that Sam is going quietly, I'll mount and do a quick warm-up under saddle.

Warming Up Under Saddle

I like to begin and end every ride with at least 10 minutes of walking. The first 5 minutes or so are done on a loose rein, inviting Sam to stretch his neck and back. For the next 5 minutes, I take up a little on the rein and ask him to march forward into the contact. I also use this time to check my position, finding center in the saddle, stretching down through my legs, and making sure that my elbows are at my sides so that I'm ready to give Sam clear, definite cues.


Asking Sam to bend to the inside and yield away from my leg helps me feel for his responsiveness to my aids, even in a busy warm-up ring the morning of a show.

Walking doesn't have to be boring. During the walking phase of my warm-up, I incorporate several changes of direction, spirals, serpentines, circles of all sizes, lengthening and shortening strides, and a halt or two to get Sam thinking and paying attention to my aids. Although Sam really thrives on an active warm-up routine, some horses would rather be left alone for a few minutes before being asked to engage mentally and physically. Pay attention to the feedback you're getting and adjust your routine accordingly.

Our trot work in the warm-up consists of something I like to call a "stretchy trot," but other riders call "forward, down, and low" or "FDL". The basic premise is that the horse should be allowed to trot forward into a long, low frame so that he can stretch his neck and back forward and down, loosening the muscles along the topline and inviting him to really reach for the contact.

Sam really uses the stretchy trot as an opportunity to release whatever tension he's built up in his body and develop "throughness" from his hindquarters into the bridle. I always post the stretchy trot to give him more freedom to round his back and to help establish a good working rhythm. Usually, the result is a supple, flowing trot that is easy for him to maintain when I take up more contact. As in the walk, I ask Sam for all kinds of movements in the stretchy trot to make sure we're still on the same page.


Sam, ridden by the barn manager at Lakeview Farms, shows the roundness and nice, fluid forward movement that is a product of the stretchy trot. Love it! (Many thanks to Diane for riding Sam so that I could actually see how he goes.)

Once the trot is nice and fluid and I have successfully taken up contact for a few minutes without having Sam get fussy and behind the bit (which he has a tendency to do if he feels that I've shortened the reins too soon), I'll ask him to canter. Cantering Sam requires a bit of finesse, as he's learned to anticipate the cue somewhere down the line and can get pretty fidgety coming into it. To keep him quiet and prevent anticipation, I keep a fairly long rein through the entire warm-up at the canter and allow him to find his own balance while staying out of his way as much as possible.

The whole process takes about 20-30 minutes, depending on how "together" Sam and I are feeling on any particular day. Depending on how Sam feels, I might make a few minor adjustments to the routine such as asking for a few strides of canter if he's being particularly sluggish or behind the aids in the trot. When I ask him to trot again, he's usually more willing to cooperate. (I have found that warming up at the canter before working at the trot is also beneficial to horses with stiffness in the back or arthritis in the joints.) That aside, my basic warm-up routine is a pretty solid "go-to" program that sets both of us up for a good ride later on, whether we're just lessoning at home or away at the show.

Remember, the warm-up is designed to engage your horse's mind and body, no matter what your discipline. Don't be discouraged if a warm-up turns into an entire ride; it's better to take the time to work through any issues your horse may have - stiffness, unwillingness to bend, etc. -  when they first develop, rather than waiting to address things until they've become a full-blown problem. Even if you have to set aside your training goals for the day and focus on warm-up exercises, you'll eventually have a horse with a solid foundation that will be a major building block for all future work.

Tuesday, January 3, 2012

"Baby, it's COLD outside!" Part I: Warm Up Techniques for the Rider

Winter is officially upon us! The onset of colder temperatures means that the warm-up phase of each ride becomes ever more important for both horse and rider. A solid warm-up routine prepares the horse and rider for physical exertion and can help prevent soreness and muscle fatigue later on, especially in the colder months when joint lubrication and tight muscles can be a real issue.

If you're like me, your usual riding warm-up routine consists of giving your horse a good grooming, tacking up, and swinging into the saddle. While there's no doubt that a vigorous currying session with a mud-caked horse will get the blood flowing, grooming fails to address the major muscle groups that are essential to performance in the saddle. 

When I began putting together a real warm-up routine for myself, I found the "Equilates" videos by Jigsaw Equine to be very helpful. The Equilates program was designed to teach riders body awareness techniques to help riders realign their bodies and find a better seat, both on and off the horse. As part of that program, Olympic dressage rider and Equilates instructor Rachael Faulkner teaches riders the benefits of stretches in the stable.

I like to incorporate the Equilates stable stretches after I've warmed up a little by jogging in place or taking a brisk walk to catch my horse and giving him a good grooming so that my heart rate is already elevated and my muscles are already beginning to feel a little loose. That way, I am at a reduced risk of straining a muscle or otherwise tweaking something and causing more harm than good.

"Stretches in the Stable" Exercise 1: The Dumb Waiter

"Stretches in the Stable" Exercise 2: The Roll Down

"Stretches in the Stable" Exercise 3: The Corkscrew

"Stretches in the Stable" Exercise 4: The Hamstring Stretch

"Stretches in the Stable" Exercise 5: The Hip Flexor Stretch

"Stretches in the Stable" Exercise 6: The Spine Twist

I hope you find these videos useful and can incorporate at least some of them into your personal warm-up routine. If you already have a warm-up routine that works for you, feel free to share it in the comments below!

Sunday, January 1, 2012

Happy New Year!


Welcome to 2012!

I confess, I haven't made any New Year's resolutions, but I HAVE worked at setting new goals for myself and committing to lifestyle changes. It's sort of like comparing the equestrian who commits herself to give her horse a solid foundation through correct training to the one who is satisfied with taking short-cuts and leaving out steps. The rider who uses training gadgets and gizmos may see results faster, but at what price? When the gadgets are removed, will the results remain? Are there holes in the horse's training that will need to be addressed later on? For me, the answer is clear: do things right the first time, even if it takes a little longer.

Last September, I signed up with Weight Watchers and committed to changing my eating and exercise habits. It's not that I feel like I need to fit into a socially-prescribed mold -- I know that I'll probably never be a size 2 -- but the acknowledgement that a lighter, fitter me is more capable of becoming the rider that Sam deserves. I had to own the fact that, in all fairness, I should be just as fit as I'm asking him to be. So far, I've lost 12lbs, or 5% of my total weight loss goal, but I know I've still got a long way to go yet.

I also signed up with Dressage Today's New Year, New You challenge in December. Starting today, Dressage Today and SmartPak have teamed up to give riders a 31 day program to "wellness with your horse." When I first saw the challenge, I thought "This is exactly what I need when I'd really rather stay on the couch in sweatpants, wrapped up in a blanket!" If you haven't signed up already, there's still time to get on board with the program.

http://www.equisearch.com/new-year-new-you/day-1-move-it-move-it

Today's New Year, New You e-mail contains a video from Outfoxed Farm that reminds us that the first step is as simple as getting out of the house and into the barn. What are you waiting for? GO RIDE!